txAdmin Configuration for FiveM with ESX Legacy
txAdmin is the official management tool for FiveM servers. It significantly simplifies server installation and configuration, especially with preconfigured templates like ESX Legacy for roleplay.
🎯 What are txAdmin and ESX?
txAdmin
- ✅ Intuitive web interface to manage your FiveM server
- ✅ Automatic installation of resources via templates
- ✅ Real-time console to monitor the server
- ✅ Player management (kick, ban, whitelist)
- ✅ Integrated backup system
- ✅ Detailed logs for debugging
ESX Legacy
- ✅ Complete modern roleplay framework
- ✅ Advanced economy (jobs, banking, businesses)
- ✅ Inventory system with weight and items
- ✅ Various jobs (police, EMS, mechanic, businesses)
- ✅ Optimized MySQL/MariaDB database
- ✅ Active community and free resources
📋 Prerequisites
Before configuring txAdmin, make sure you have:
- ✅ FiveM server ordered from HebergTonServ
- ✅ MySQL database created (via panel)
- ✅ Valid FiveM license key (from keymaster.fivem.net)
- ✅ Access to HebergTonServ panel
- ✅ 30-45 minutes for configuration
💡 Tip: If you don’t have a database yet, create one in the HebergTonServ panel (Database section) before continuing.
🚀 Step 1: First Start and txAdmin Access
1.1 Start the Server
- Log in to HebergTonServ panel: https://manage.hebergtonserv.com
- Select your FiveM server from the list
- In the Console tab, click Start
- Wait a few seconds for the server to start
1.2 Get txAdmin Link and PIN Code
Monitor the console, you will see messages like:
[txAdmin] =====================================================
[txAdmin]
[txAdmin]   txAdmin v7.5.0 is starting...
[txAdmin]
[txAdmin]   Your admin interface is available at:
[txAdmin]
[txAdmin]   URL: http://xxx.xxx.xxx.xxx:40120
[txAdmin]
[txAdmin]   To login, use this unique PIN:
[txAdmin]   PIN: 1234-5678
[txAdmin]
[txAdmin]   This PIN expires in 15 minutes.
[txAdmin]
[txAdmin] =====================================================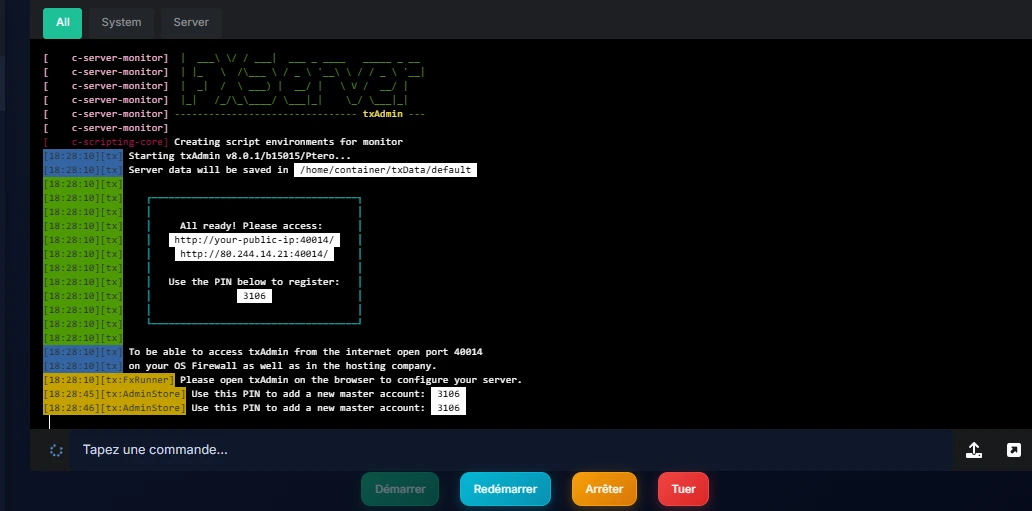
⚠️ IMPORTANT:
- Copy the URL and PIN immediately
- The PIN expires after 15 minutes
- If you miss the deadline, restart the server to get a new PIN
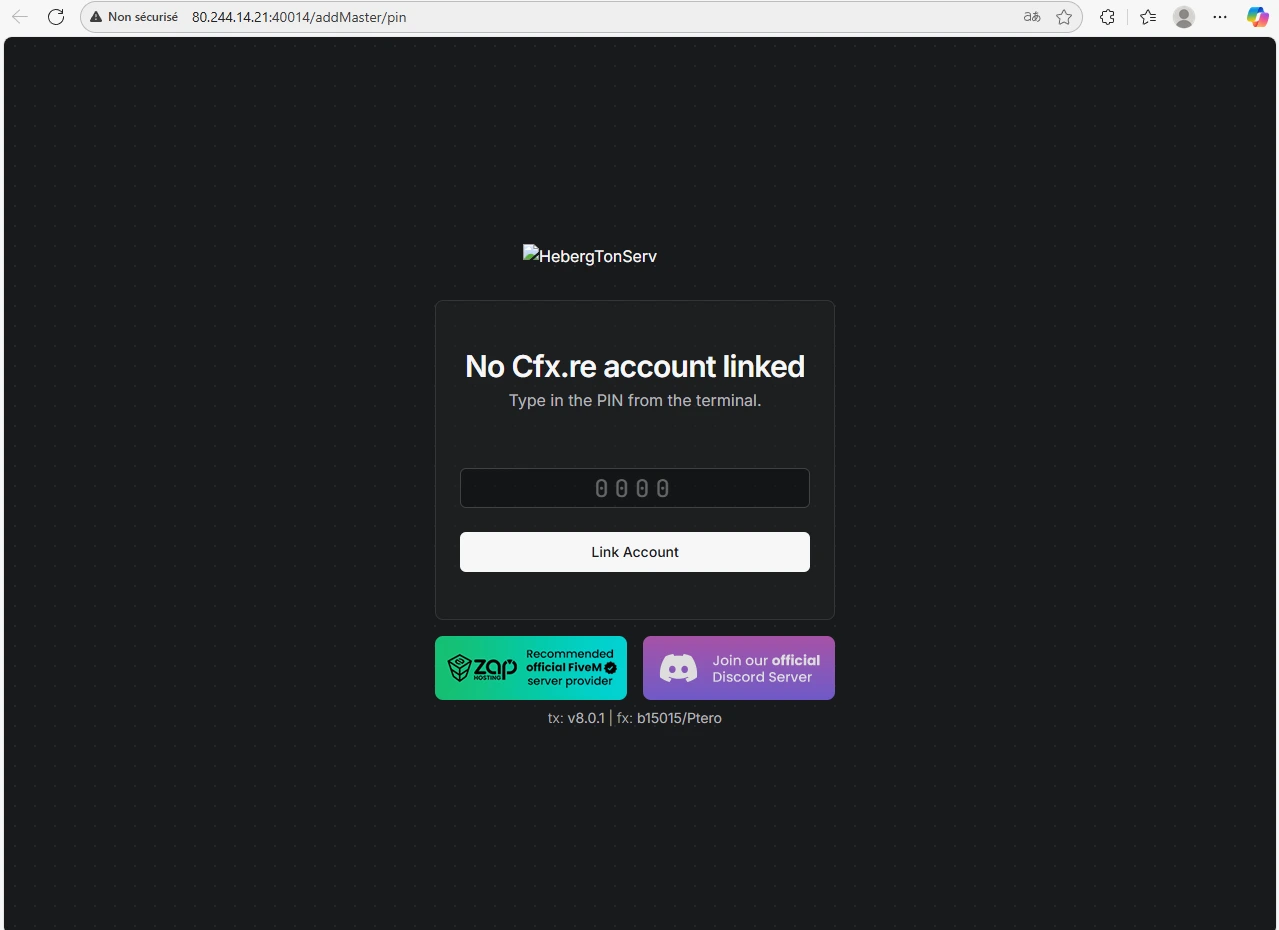
1.3 Access txAdmin Interface
- Open your browser (Chrome, Firefox, Edge)
- Paste the URL provided in the console (e.g.,
http://192.168.1.100:40120) - You arrive at the txAdmin login screen
🔐 Step 2: Create Administrator Account
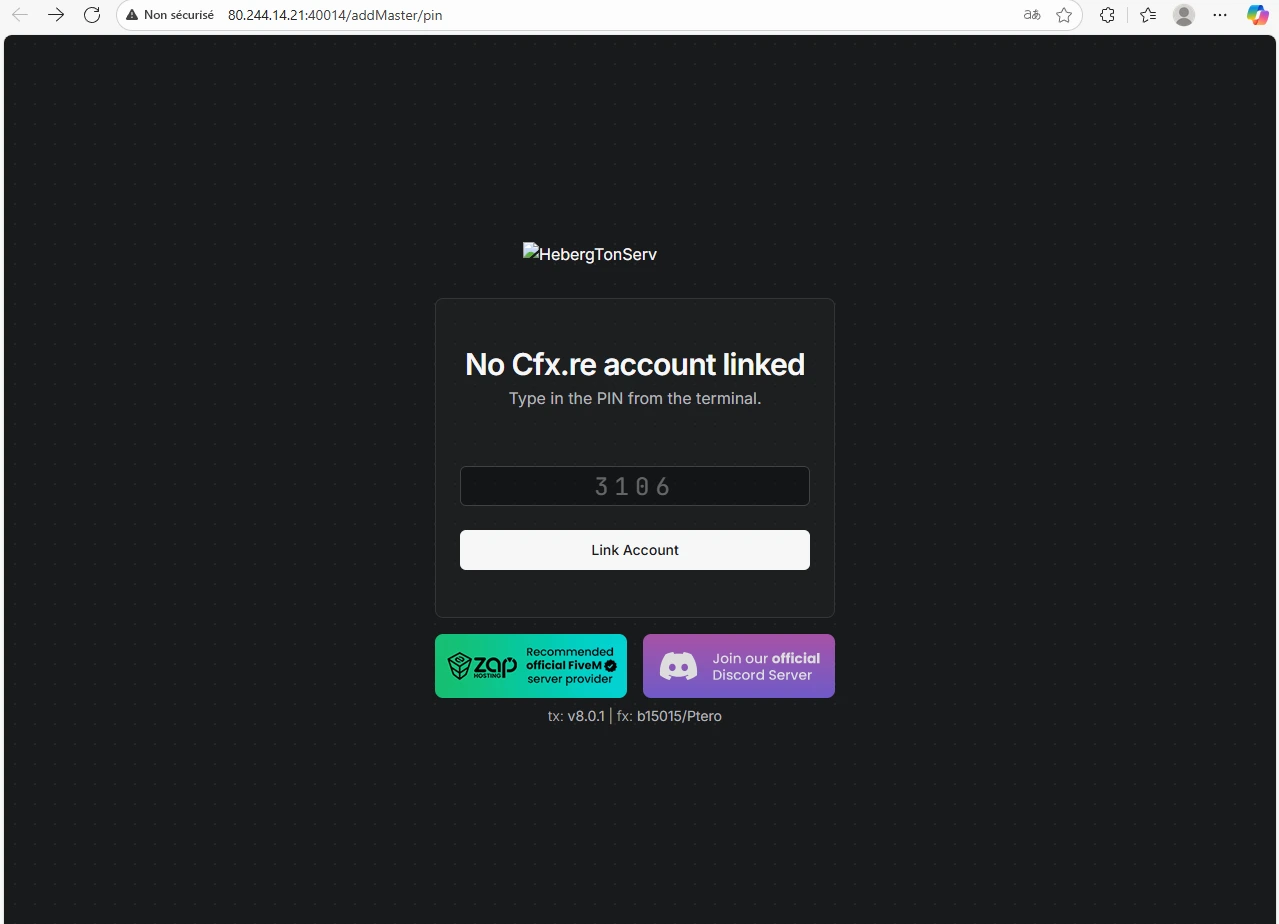
2.1 First Login
- Enter the PIN you copied previously
- Click Verify PIN
2.2 Create Your Master Account
You will be prompted to create the main administrator account:
┌─────────────────────────────────────┐
│  Create administrator account       │
├─────────────────────────────────────┤
│  Username: admin                    │
│  Password: ••••••••••••             │
│  Confirm: ••••••••••••               │
└─────────────────────────────────────┘
Security Recommendations:
- ✅ Use a strong password (12+ characters)
- ✅ Mix uppercase, lowercase, numbers, and symbols
- ✅ Don’t reuse an existing password
- ✅ Keep these credentials in a safe place
Strong password example: TxAdm!n2025$FiveM
2.3 CFX.re Validation (optional but recommended)
txAdmin may ask you to link your CFX.re account (FiveM forum):
- Why? Allows access to official templates and updates
- How? Click “Link my CFX.re account” and follow the steps
- Required? No, but highly recommended for all templates
⚙️ Step 3: Initial Server Configuration
3.1 Setup Wizard
After login, txAdmin automatically launches the Setup Wizard:
╔════════════════════════════════════════╗
║  txAdmin Configuration Wizard          ║
║                                        ║
║  1️⃣  Choose deployment mode            ║
║  2️⃣  Configure server                  ║
║  3️⃣  Install resources                 ║
║  4️⃣  Start server                      ║
╚════════════════════════════════════════╝
3.2 Select “Popular Templates” Mode
You will have 4 options:
Popular Templates ← CHOOSE THIS ONE
- Preconfigured templates (ESX, QBCore, etc.)
- Automatic installation
- Recommended for beginners
Remote URL Template
- Load template from GitHub link
- Advanced usage
Local Server Data
- If you already have server files
- For migrations
Empty Server
- Blank server without resources
- For experts
Select “Popular Templates”.
3.3 Server Name
Before showing the templates list, txAdmin will ask you to enter a server name:
┌─────────────────────────────────────┐
│  Server Name                        │
├─────────────────────────────────────┤
│  Enter a short name for your server │
│  (used in txAdmin interface and     │
│  Chat/Discord messages)             │
│                                     │
│  Name: My RP Server                 │
└─────────────────────────────────────┘
Server Name: A short server name to be used in txAdmin interface and Chat/Discord messages.
Example names:
My RP ServerESX Legacy ServerFiveM Roleplay ENCommunity RP
💡 Note: This name is different from
sv_hostnameinserver.cfg. This is only the internal name for txAdmin.
Enter a descriptive name and click Next to access the templates list.
📦 Step 4: ESX Legacy Template Installation
4.1 Choose ESX Legacy
Now that you’ve entered the server name, txAdmin displays the popular templates list:
┌──────────────────────────────────────────┐
│  📋 Popular Templates                    │
├──────────────────────────────────────────┤
│  🎭 ESX Legacy                           │
│     Complete roleplay framework          │
│     Version: 1.10.x                      │
│     Size: ~150 MB                        │
│     [Select]                             │
├──────────────────────────────────────────┤
│  🚓 QBCore                               │
│     Alternative roleplay framework       │
│     [Select]                             │
├──────────────────────────────────────────┤
│  🏁 CFX Default                          │
│     Basic server without framework       │
│     [Select]                             │
└──────────────────────────────────────────┘
Click “Select” next to ESX Legacy.
4.2 ESX Template Information
txAdmin displays template details:
- Name: ESX Legacy
- Description: Modern roleplay framework with economy, jobs, inventory
- Included:
- es_extended (ESX core)
- esx_menu_default and esx_menu_dialog
- Base jobs (police, EMS, mechanic)
- Banking system
- Inventory and storage
- Base scripts (clothes, vehicles, garages)
Click “Install this template”.
4.3 Download and Installation
txAdmin will automatically:
- Download the template from GitHub (~150 MB)
- Extract files to your server
- Generate the base
server.cfgfile - Create folder structure
📥 Downloading template...
[████████████████████] 100% - ESX Legacy downloaded

📂 Extracting files...
[████████████████████] 100% - 245 files extracted

⚙️ Automatic configuration...
✅ server.cfg generated
✅ Folder structure created
✅ Permissions set

⏱️ Total time: ~3-5 minutes
⏳ Patience: Download may take 3-5 minutes depending on your connection. Don’t close the page!
🗄️ Step 5: MySQL Database Configuration
5.1 Connection Information
During installation, txAdmin will ask for your MySQL database information:
┌─────────────────────────────────────────┐
│  MySQL Database Configuration           │
├─────────────────────────────────────────┤
│  Host: localhost                        │
│  Port: 3306                             │
│  Username: hts_XXXXX                    │
│  Password: ••••••••••                   │
│  Database: hts_fivem                    │
└─────────────────────────────────────────┘
5.2 Get Your MySQL Credentials
In HebergTonServ panel:
- Go to Databases tab
- If you don’t have a database yet, click Create database
- Note the following information:
Host: localhost (or provided IP)
Port: 3306
Username: your_mysql_user
Password: your_mysql_password
Database name: your_database_name
5.3 Enter Information in txAdmin
Fill out the form with your credentials:
- Host:
localhostor your MySQL server IP - Port:
3306(default) - Username: Your MySQL username
- Password: Your MySQL password
- Database: Your database name
Click “Test connection” to verify everything works.
5.4 Automatic ESX Tables Import
Once connection is tested successfully:
✅ MySQL connection successful!

📊 Importing ESX tables...
   - Creating 'users' table
   - Creating 'accounts' table
   - Creating 'jobs' table
   - Creating 'items' table
   - Creating 'vehicles' table
   - [... 25 more tables]

✅ Import complete: 30 tables created
txAdmin automatically imports all necessary SQL tables for ESX:
- User tables (users, accounts, identities)
- Economy tables (banking, transactions)
- Job tables (jobs, job_grades)
- Inventory tables (items, inventory)
- Vehicle tables (owned_vehicles, garages)
- Property tables (properties, owned_properties)
- And more…
💡 Note: If you get an import error, verify your database is empty or use a new one.
🔧 Step 6: server.cfg Configuration
6.1 Access Configuration Editor
txAdmin redirects you to the server.cfg editor:
- In txAdmin interface, go to Settings tab
- Click CFG Editor
6.2 Essential Configuration
txAdmin has already generated a base server.cfg, but you must customize a few CRITICAL elements:
A. FiveM License (REQUIRED)
# Your FiveM license key
sv_licenseKey "PASTE_YOUR_KEY_HERE"
How to get your key?
- Go to https://keymaster.fivem.net/
- Login with your CFX.re account
- Click “Generate Key”
- Copy the key and paste it in
sv_licenseKey
⚠️ WITHOUT THIS KEY, THE SERVER WILL NOT START!
B. Server Information
# Your server name (displayed in the list)
sv_hostname "My ESX Server | Roleplay EN"

# Tags for referencing
tags "esx, roleplay, en, whitelist"

# Language
locale "en_US"
C. Slots (players)
# Maximum number of players (according to your plan)
sv_maxclients 32
Adjust according to your HebergTonServ subscription:
- Starter: 32 slots
- Premium: 64 slots
- Ultimate: 128 slots
D. MySQL Connection (verification)
Verify that the following line is correct (txAdmin normally filled it):
# Database connection
set mysql_connection_string "mysql://user:password@localhost/database?charset=utf8mb4"
Replace:
userwith your MySQL usernamepasswordwith your MySQL passworddatabasewith your database name
Alternative format if the first doesn’t work:
set mysql_connection_string "server=localhost;database=your_db;userid=your_user;password=your_pwd"E. Network Settings
# Server port (default)
endpoint_add_tcp "0.0.0.0:30120"
endpoint_add_udp "0.0.0.0:30120"

# Visibility in server list
sv_master1 ""
💡 Note: Only change the port if HebergTonServ assigned you a specific port.
6.3 Optional Customization
Welcome Message
# Message displayed on connection
sv_endpointprivacy true
sv_scriptHookAllowed 0

# Custom messages
load_server_icon myLogo.png
sv_projectName "My RP"
sv_projectDesc "English roleplay server with ESX Legacy"
Logs and Performance
# Enable detailed logs
set mysql_debug 1
set mysql_slow_query_warning 150

# Memory optimization
set es_enableCustomData 1
6.4 Save Configuration
- Verify all information is correct
- Click “Save” at the top of the editor
- txAdmin automatically validates syntax
✅ Configuration saved successfully!
⚠️ Restart server to apply changes.
▶️ Step 7: First Server Start
7.1 Start Server with ESX
In txAdmin interface:
- Go to Live Console tab
- Click “START” button (green button)
7.2 Monitor Startup Logs
Console displays real-time startup:
[  txAdmin  ] Starting server...
[  FXServer ] Listening on 0.0.0.0:30120
[  mysql-async ] MySQL connection established
[  es_extended ] ESX Legacy v1.10.7 starting...
[  es_extended ] Loading core modules...
[  es_extended ] ✅ Core loaded successfully
[  esx_menu_default ] Menu initialized
[  esx_society ] Society system loaded
[  esx_jobs ] Jobs registered: police, ambulance, mechanic
[  esx_billing ] Billing system ready
[  esx_vehicleshop ] Vehicle shop initialized
[  FXServer ] Server started successfully
[  FXServer ] Players can now connect to your server
Success Signs:
- ✅
MySQL connection established(DB connection successful) - ✅
ESX Legacy v1.10.x starting...(ESX starting) - ✅
Core loaded successfully(ESX core loaded) - ✅ All ESX resources load without errors
- ✅
Server started successfully(server started)
7.3 Common Errors and Solutions
Error 1: “Invalid license key”
❌ [ERROR] Invalid license key providedSolution:
- Verify you copied the complete key
- No spaces before/after the key
- Generate a new key on keymaster.fivem.net if necessary
Error 2: “Failed to connect to MySQL”
❌ [mysql-async] Failed to connect to databaseSolutions:
- Verify MySQL credentials in
server.cfg - Test connection from phpMyAdmin (panel → Databases)
- Verify database exists and is not empty
- Make sure ESX tables were imported
Error 3: “Resource [xxx] failed to start”
❌ Failed to start resource esx_ambulancejobSolutions:
- Verify resource folder exists
- Check detailed logs for specific error
- Verify resource dependencies
7.4 Check Resources Status
In txAdmin console, you can see all loaded resources:
- Go to Resources tab
- Verify all ESX resources have “Running” status (green)
- If a resource is red, click it to see error logs
🎮 Step 8: Server Connection Test
8.1 Find Your Server Address
In HebergTonServ panel:
- Server Information section
- Note the IP address and port:
Address: 192.168.1.100:30120
8.2 Connect via FiveM
- Open FiveM
- Press F8 to open console
- Type:
connect 192.168.1.100:30120 - Press Enter
8.3 First Connection
On your first connection to an ESX server:
┌─────────────────────────────────────┐
│  Create your character              │
├─────────────────────────────────────┤
│  First name: John                   │
│  Last name: Doe                     │
│  Birth date: 01/01/1990             │
│  Sex: Male / Female                 │
│  Height: 180 cm                     │
└─────────────────────────────────────┘
Fill out the character creation form.
8.4 Essential Checks
Once connected, test these basic ESX features:
Test 1: Main Menu
- Press F1 (default)
- ESX menu should open
- You should see: Inventory, Phone, Clothes, etc.
Test 2: Inventory
- Press F2 (or via F1 menu)
- Inventory should display with your items
Test 3: NPC Interaction
- Approach a shop (blip on map)
- Press E to interact
- Shop menu should open
Test 4: Phone
- Press F3 (ESX phone)
- Check that apps work (contacts, messages)
Test 5: Bank Account
- Open menu (F1) → Bank
- You should have an account with $5000 starter money (ESX default)
8.5 Console F8 - Technical Checks
Open FiveM console (F8) and verify:
# See loaded resources
resmon

# Check ESX status
esx status

# See your player data
esx mydata
Everything works if:
- ✅ No red errors in F8 console
- ✅ ESX menus open correctly
- ✅ You can interact with NPCs
- ✅ Your bank account is visible
- ✅ Inventory responds
👨💼 Step 9: Admin Permissions Configuration
9.1 Give Yourself Admin Rights
By default, you’re just a regular player. To access admin commands and menu:
Method 1: From txAdmin Console
- Go to txAdmin interface
- Players tab
- Find your player in the list
- Click “Manage”
- In “Server Permissions” → add:
group.admin - Save
Method 2: Via MySQL Database
- Access phpMyAdmin (panel → Databases)
- Select your ESX database
- Open
userstable - Find your row (with your character name)
- Edit
groupcolumn:group: admin - Save
Method 3: Via FiveM Console (in-game)
If you have server console access:
- Find your player ID (displayed in top right corner)
- In txAdmin console, type:
add_ace group.admin command allow
add_principal identifier.steam:YOUR_STEAM_HEX group.admin
9.2 ESX Permission Levels
ESX Legacy offers several permission levels:
user       → Regular player
mod        → Moderator (kick, warn)
admin      → Administrator (noclip, spawn items)
superadmin → Super admin (full access)
9.3 Test Your Admin Permissions
Reconnect to the server and test:
Admin Menu
- Press F5 or F10 (depending on config)
- You should see admin menu with:
- Player management (kick, ban, teleport)
- Vehicle spawn
- Noclip / Godmode
- Money management
- Item spawn
Admin Commands in Chat
Press T (chat) then test these commands:
/car <vehicle_name>         → Spawn vehicle
/tp <player_id>             → Teleport to player
/bring <player_id>          → Bring player to you
/setjob <id> <job>          → Assign job
/givemoney <id> <amount>    → Give money
/revive                     → Revive yourself
/noclip                     → Enable noclip
/fix                        → Repair vehicle
Example:
/car adder
→ Spawns an Adder (luxury car)

/setjob 1 police 3
→ Gives police job grade 3 to player ID 1
🔧 Step 10: ESX Server Customization
Now that your server works, you can customize it:
10.1 Add Additional ESX Resources
Many free resources are available:
Recommended Sites:
- GitHub ESX Legacy: https://github.com/esx-framework
- CFX Forums: https://forum.cfx.re/
- ESX-Resources: https://github.com/esx-framework/esx_extended/wiki
Popular Categories:
- 🚓 Additional jobs (garbage collector, taxi, miner, lumberjack)
- 🏠 Properties and real estate
- 🚗 Advanced dealerships
- 📱 Phone systems (gcphone, d-phone)
- 🎭 Identity and appearance
- 🛡️ Weapons and improved inventory
- 📊 Statistics and HUD
10.2 Install a New Resource
Example: Installing esx_drugs (drugs)
- Download resource from GitHub
- Unzip archive
- Upload
esx_drugsfolder to/resources/[esx]/ - Import SQL (if provided) to your database
- Add to server.cfg:
ensure esx_drugs - Restart server
10.3 Configure Jobs and Grades
Modify existing jobs in database:
jobs Table:
-- Example: Add new job
INSERT INTO jobs (name, label) VALUES ('taxi', 'Taxi');

-- Add grades
INSERT INTO job_grades (job_name, grade, name, label, salary)
VALUES ('taxi', 0, 'recrue', 'Recruit', 150);
Or via ESX Script:
-- In config file
Config.Jobs = {
    ['police'] = { label = 'LSPD', grades = {...} },
    ['ambulance'] = { label = 'EMS', grades = {...} },
    ['taxi'] = { label = 'Taxi', grades = {...} }
}
10.4 Customize Economy
Modify prices and salaries in config files:
File: resources/[esx]/esx_shops/config.lua
Config.Items = {
    { name = 'bread', price = 5 },      -- Bread at $5
    { name = 'water', price = 3 },      -- Water at $3
    { name = 'phone', price = 500 }     -- Phone at $500
}
File: resources/[esx]/esx_society/config.lua
Config.Salaries = {
    ['police'] = {
        [0] = 500,  -- Recruit
        [1] = 800,  -- Officer
        [2] = 1200  -- Sergeant
    }
}
10.5 Add Custom Vehicles
File: resources/[esx]/esx_vehicleshop/config.lua
Config.Vehicles = {
    { model = 'adder', name = 'Adder', price = 500000 },
    { model = 'zentorno', name = 'Zentorno', price = 750000 },
    -- Add your custom vehicles
    { model = 'lamborghini', name = 'Custom Lamborghini', price = 1000000 }
}
Don’t forget to install vehicle files (ytd, yft, ytf) in resource /stream/ folder.
🛡️ Step 11: Security and Optimization
11.1 Secure txAdmin Access
By default, txAdmin is accessible to everyone. Secure it:
In server.cfg, add:
# Restrict txAdmin access
set txAdminPort 40120
set txAdminInterface "127.0.0.1"
This limits access to localhost only. You’ll need to use SSH tunnel to access it:
# From your PC
ssh -L 40120:localhost:40120 your_user@server_ip
Then open http://localhost:40120 in your browser.
11.2 Enable Automatic Backup
In txAdmin:
- Go to Settings → FXServer Settings
- Enable Auto Backup
- Configure:
Frequency: Every 6 hours
Backups to keep: 7
Include: Database + Files
11.3 Performance Optimization
In server.cfg, add:
# Limit crashes
set onesync on
set onesync_enabled true

# Network optimization
set sv_enforceGameBuild 2699

# Limit threads
set sv_scriptHookAllowed 0

# Enable cache
set txAdmin-locale en
Resource-heavy scripts to monitor:
- Heavy mapping scripts (many objects)
- Vehicle systems with many props
- Poorly optimized scripts (infinite loops)
Diagnostic Tool:
- In FiveM (F8) →
resmon→ sort by CPU/RAM to identify problematic resources
11.4 Logs and Monitoring
Enable detailed logs for debugging:
In server.cfg:
# MySQL logs
set mysql_debug 1
set mysql_slow_query_warning 100

# Detailed ESX logs
setr es_enableCustomData 1
Check logs in txAdmin:
- Live Console tab (real-time logs)
- Server Logs tab (full history)
🚨 Common Problem Troubleshooting
Problem 1: “Cannot connect to server”
Symptoms:
- Server doesn’t appear in list
- Message: “Connection to server failed”
Solutions:
- Verify server is started (txAdmin console → “Running” status)
- Verify port in server.cfg (30120 default)
- Test direct connection:
F8 → connect IP:PORT - Verify firewall allows the port
- Wait 5-10 minutes (server list synchronization)
Problem 2: “You were kicked: MySQL error”
Symptom:
- Immediate kick with MySQL error message
Solutions:
- Verify MySQL connection in
server.cfg - Test connection via phpMyAdmin
- Verify ESX tables are imported:
SHOW TABLES; -- Should return ~30 ESX tables - Check MySQL logs in txAdmin console
Problem 3: “ESX Menu won’t open”
Symptom:
- No menu opens when pressing F1/F2
Solutions:
- Verify
esx_menu_defaultandesx_menu_dialogare started:txAdmin Console → Resources → check status - If red, restart resource:
restart esx_menu_default - Check keys in
resources/[esx]/esx_menu_default/config.lua - Test with F8 →
esx:openMenu
Problem 4: “Jobs don’t work”
Symptom:
- Cannot take a job
- Empty job menu
Solutions:
- Verify
jobsandjob_gradestables contain data:SELECT * FROM jobs; - Reimport ESX SQL file if empty
- Verify
esx_societyis started - Restart job resources:
restart esx_policejob
restart esx_ambulancejob
Problem 5: “Script error - failed to load resource”
Symptom:
❌ Failed to load resource [esx_xxx]
Error parsing fxmanifest.luaSolutions:
- Verify resource
fxmanifest.luasyntax - Verify dependencies are present:
dependencies { 'es_extended', 'esx_menu_default' } - Verify file permissions (chmod 755)
- Reupload resource if corrupted
Problem 6: “Poor performance / lag”
Symptoms:
- Low FPS
- High latency
- Frequent freezes
Solutions:
- Open
resmon(F8) and sort by CPU:resmon - Identify resource-heavy resources (>10ms)
- Temporarily disable heavy resources:
stop [resource_name] - Optimize problematic scripts or find alternatives
- Upgrade your HebergTonServ plan if necessary
📚 Useful Resources and Links
Official Documentation
- txAdmin: https://docs.fivem.net/docs/server-manual/setting-up-a-server-txadmin/
- ESX Legacy: https://documentation.esx-framework.org/
- FiveM Natives: https://docs.fivem.net/natives/
- CFX Forums: https://forum.cfx.re/
ESX Community
- ESX Legacy Discord: https://discord.gg/esx-framework
- ESX GitHub: https://github.com/esx-framework
- ESX Resources: https://github.com/esx-framework/esx_extended/wiki/Resources
HebergTonServ Tutorials
HebergTonServ Support
- Management Panel: https://manage.hebergtonserv.com
- Discord: https://discord.gg/26xerySCfX
- Website: https://hebergtonserv.com
✅ Final Checklist
Before considering your server “ready”:
- txAdmin accessible and secured
- Server starts without errors
- MySQL connected and tables imported
- ESX Core loaded correctly
- ESX menus functional (F1, F2, F3)
- Base jobs operational (police, EMS, mechanic)
- Economy functional (bank, shops)
- Inventory and items functional
- Vehicles spawn correctly
- Admin permissions configured
- Automatic backups enabled
- Connection tests successful
- Acceptable performance (no major lag)
🎉 Conclusion
Congratulations! You now have a functional FiveM server with ESX Legacy:
- ✅ txAdmin configured for simplified management
- ✅ ESX Legacy installed with all base systems
- ✅ MySQL database operational
- ✅ Admin permissions configured
- ✅ Optimized and secured server
Recommended Next Steps
- Customize your server with additional resources
- Create your custom economy and jobs
- Recruit a moderation team
- Promote your server on FiveM forums and Discord
- Listen to player feedback to improve experience
Going Further
- Install whitelist system (esx_whitelist)
- Add mapping scripts to customize map
- Configure faction/gang system
- Integrate advanced phone system (gcphone, quasar)
- Create events and animations for players
🆘 Need Help?
If you encounter difficulties:
- Check logs in txAdmin (Live Console)
- Search error on CFX.re forum
- Contact HebergTonServ support:
- Discord: https://discord.gg/26xerySCfX
- Panel: Support section
Our team is here to help you configure your ESX server! 🚀
Total tutorial time: 30-45 minutes Difficulty: Beginner Required maintenance: ESX update every 2-3 months